As we rocket through yet another year, my mind has turned to Christmas. It may seem a bit early to be thinking about it, unless like me, you are going to be making your gifts by hand.
Recently we visited my sister in law and her husband to meet their first child. When I gave them the baby blanket I’d made, my brother in law talked about how much they loved the Memory Blanket I’d made for them a couple Christmas’ ago and in particular, the extra touch I’d added by way of a picture box frame telling the story of the Memory Blanket’s creation. I didn’t know how much that touch meant to them until that day.
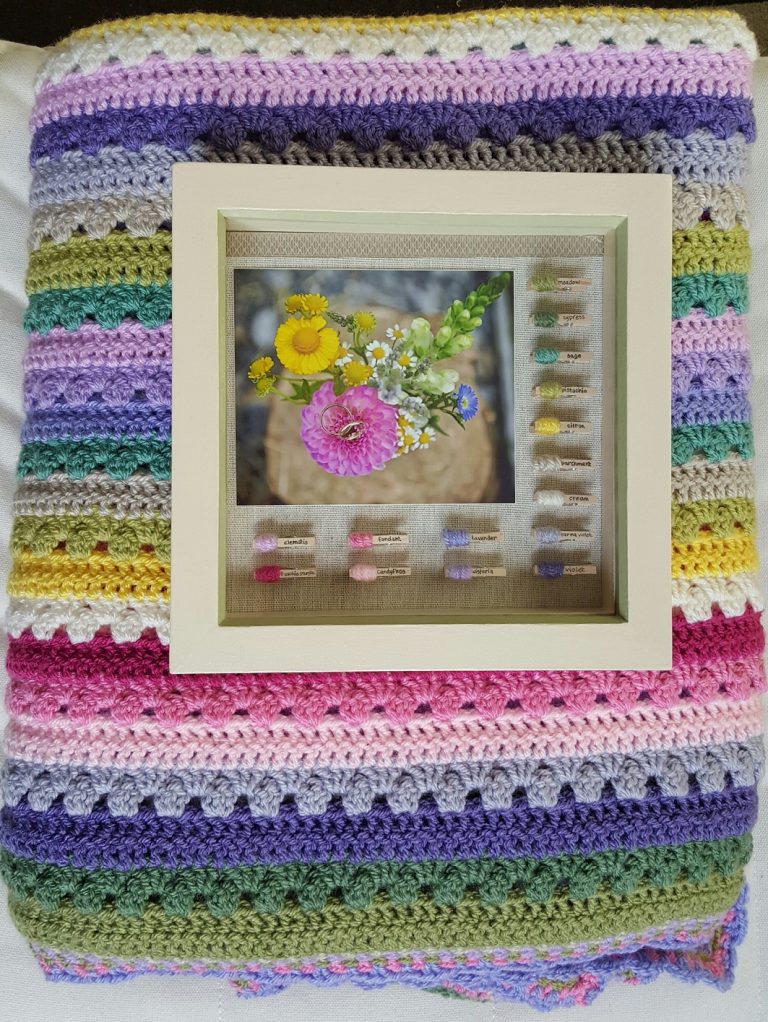
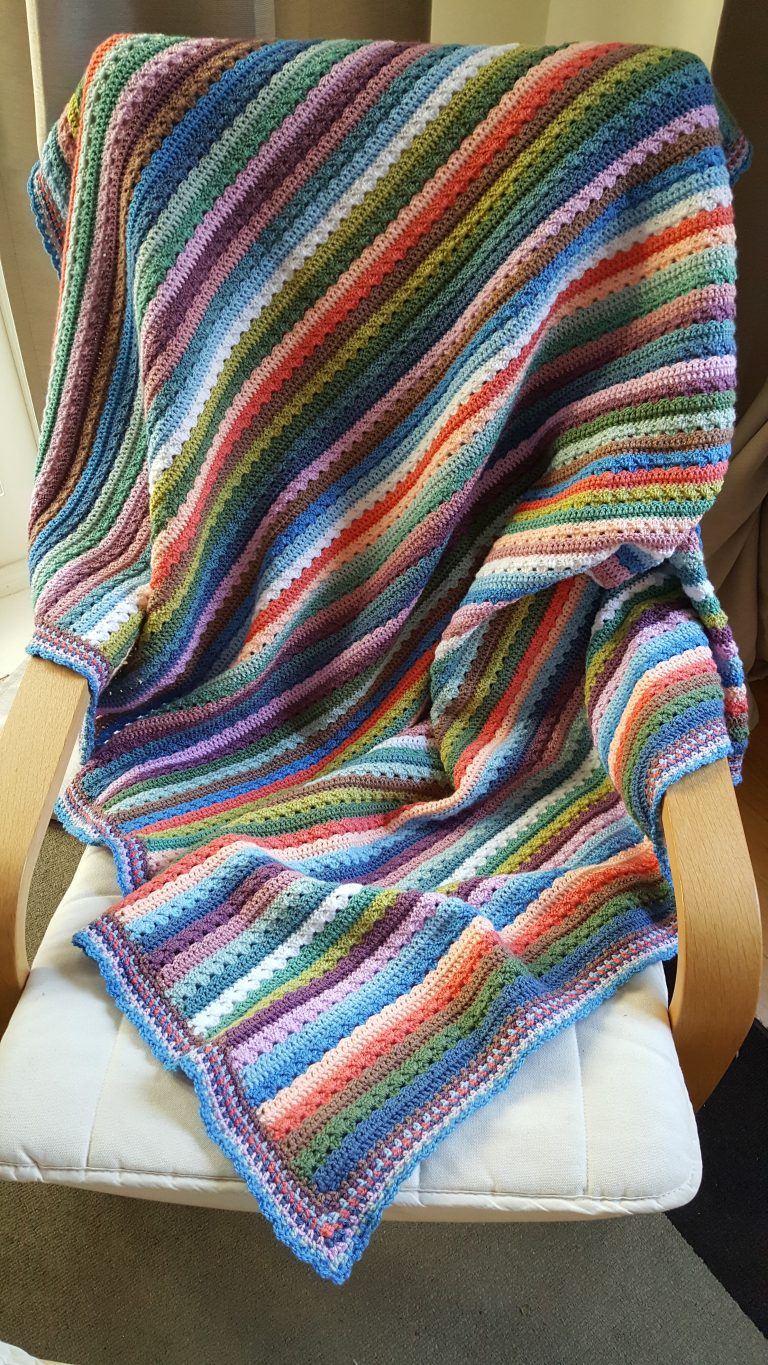
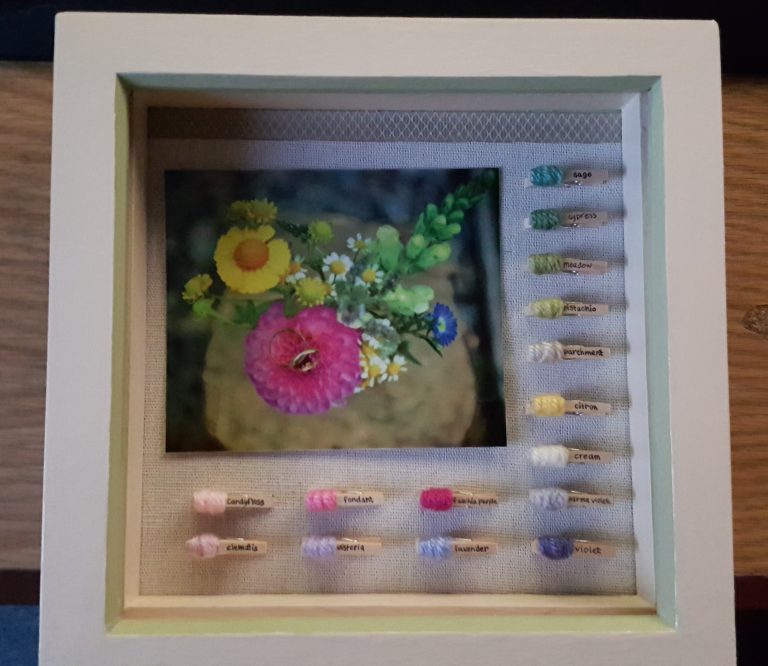
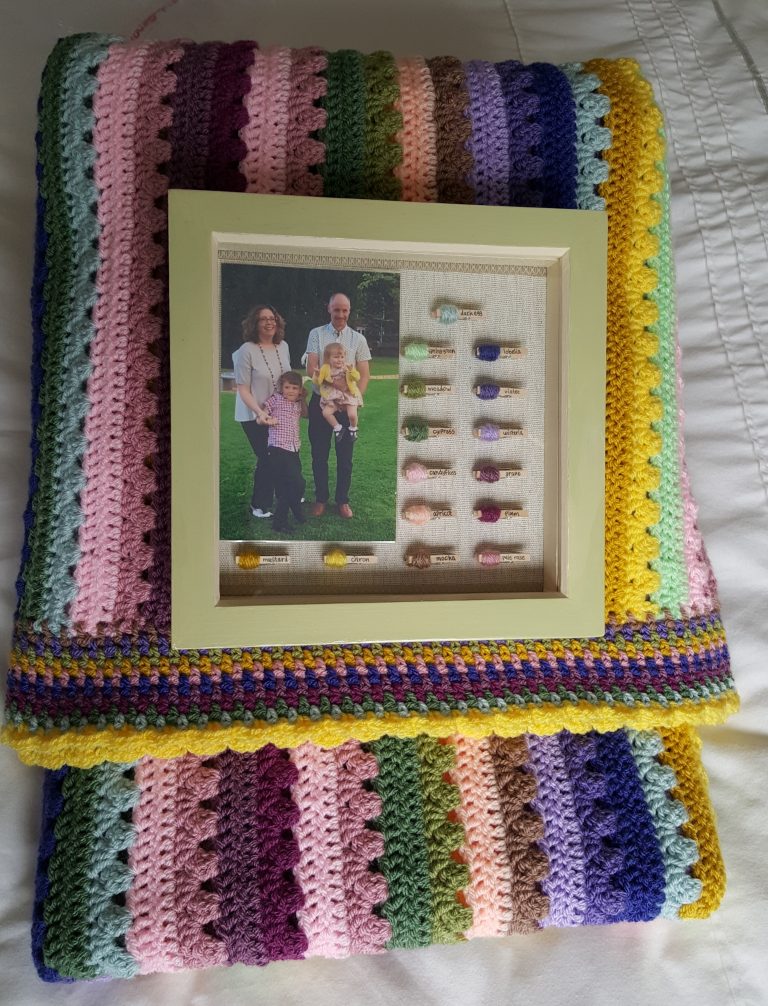
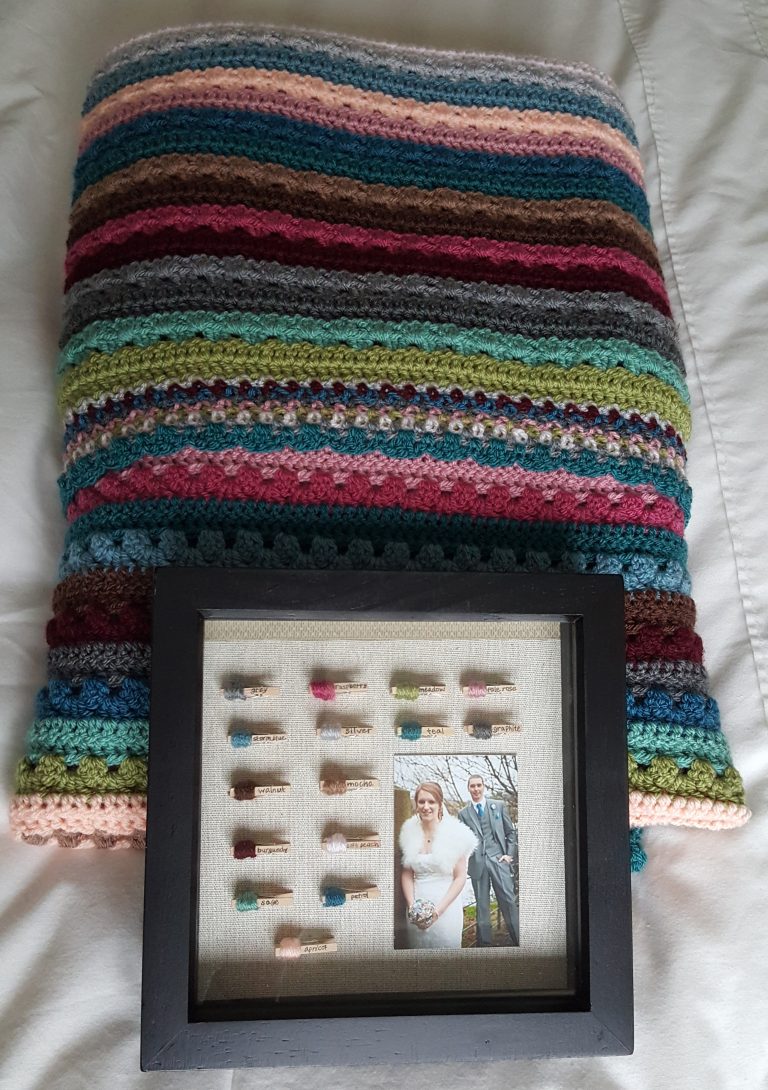
For Christmas 2016, I made Memory Blankets for my husband’s siblings and his mother, creating a picture box framed ‘story’ to go with each.
My inspiration behind the project was Attic 24’s Cupcake and Cosy striped pattern blankets. Lucy used 15 different colours in Stylecraft Special DK producing colourful, inviting and cosy throws. Perfect for my vision.
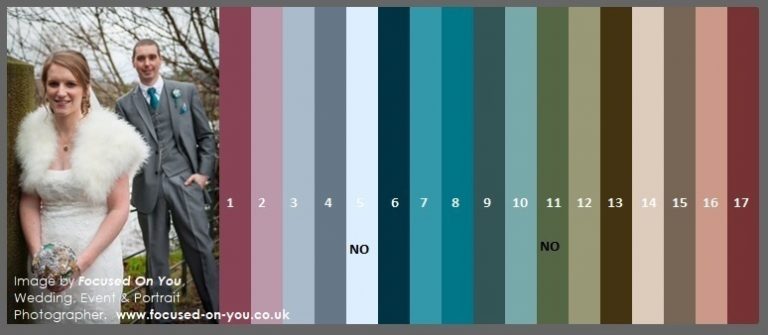
To start the project, I asked each set of in-laws to email me their favourite photograph. I didn’t ask my mother-in-law because I wanted the blanket to be a complete surprise for her.
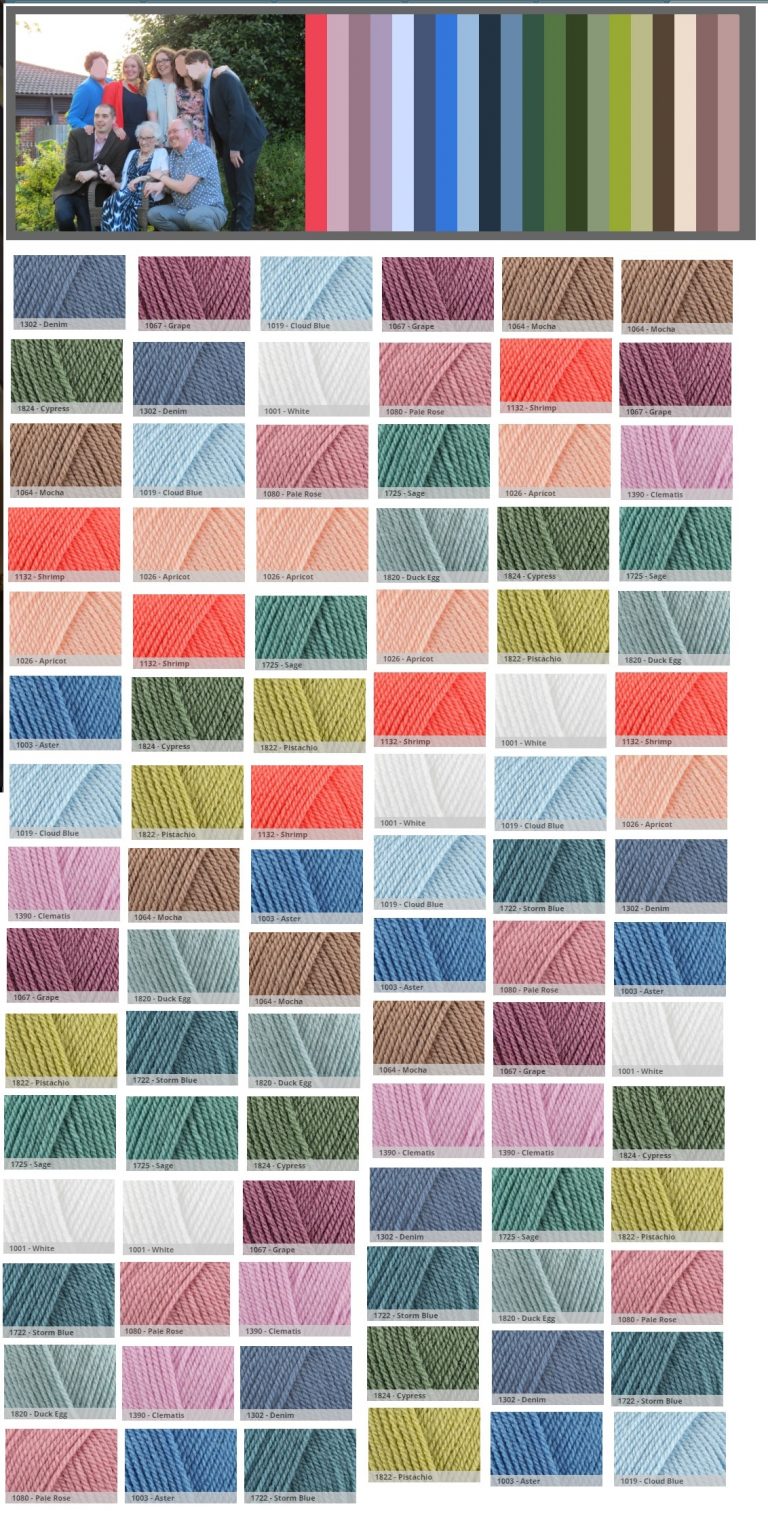
Once I had the photographs, I uploaded them into an online palette creation tool – *Colour Palette FX. The palettes produced, I emailed each couple asking them to choose their least favourite colours that were in excess of the 15 needed.
Colour choices made, it was time to plan out the stripes. Using the Windows 10 Paint Program – I copied and pasted Stylecraft Special DK colour swatches from Wool Warehouse’s website, double-checking the colours against Stylecraft’s fringed shade card. I created the order, as randomly as possible, in which the colours would be worked. This was the most time consuming part of the planning. I paired colours taking care to avoid clashes and too many colour repeats in the same places. I also kept in mind the stitch pattern, alternating between the treble crochet and granny stitch with each colour. A little bit complicated, but well worth the effort.
Once I’d finished crocheting the blankets – which in true Fizzy fashion, was just before Christmas – it was on to the picture box frames.
Thinking about the frame colours my in-laws already had in their homes, I chose two unfinished and two in a black finish. The two unfinished I hand painted and varnished.
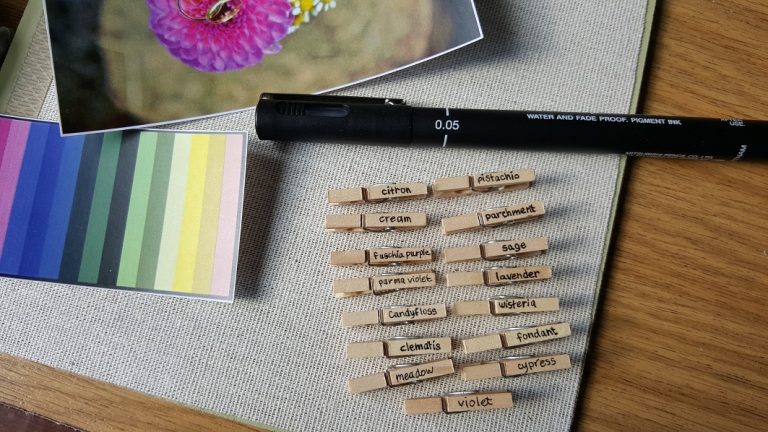
I covered the mounting boards in self adhesive fabric. Because the fabric I chose wasn’t square, I hot-glued grosgrain ribbon to hide the exposed mounting board. The pegs I labelled using a 0.05 Uni Pin fine line pen, a fade and water proof pigment ink pen. A craft magnifying lamp made this task relatively easy. The UniPen did not bleed into the wood of the peg so the lettering remained sharp. I did have to go over it a couple of times as with such a fine nib, one pass wasn’t quite enough.
The last job before assembling, was to add yarn to the pegs. To do this, I used the peg jaw to grip one end of the yarn, wrapped the length of the yarn around the jaw until it was just covered. I hot glued the free end to secure it. Hot glue is best for this job as it sets almost instantly allowing for a nice firm wrap. After the pegs were finished, I laid them out with the photo, not fixing anything in place until I was happy with how it all looked. The layout finalised, I took a picture of it for reference when gluing everything into place.
Double sided sticky pads to fix the photo to the covered mounting board worked really well. Glue can make paper a bit soggy and warp it when dry. An added bonus to using the sticky pads is that it raises the photo a little from the mounting board, giving it dimension. I used an all purpose PVA craft glue with a fine precision nib to fix the pegs in their places. Because the PVA glue doesn’t dry instantly, it allows time to make any minor adjustments. Job done!
The self adhesive fabric, ribbon and pegs I purchased from the Scrapbook and Card making section of my local Hobby Craft store. The pen I purchased from Amazon.co.uk. The Stylecraft Special DK yarns and fringed shade card I purchased from Wool Warehouse.
What I loved most about the Memory Blanket project was the added sentimental value in using the recipients favourite moments. The blanket creation story in the picture box frame is the finishing touch that makes this gift especially memorable.
Update 21 September 2025: Colour Palette FX is no longer available

Comments are closed, but trackbacks and pingbacks are open.