Howdy everyone!
Wow, what a crazy few weeks it has been in my little world. Soaring temperatures, busier than usual schedules with end of school year stuff – I was struggling to sit down to post to my blog. We finally have cooler temperatures, I’ve caught up on housework that was neglected during the heatwave, the kids are out of school – time to update my blog…whoop-whoop!
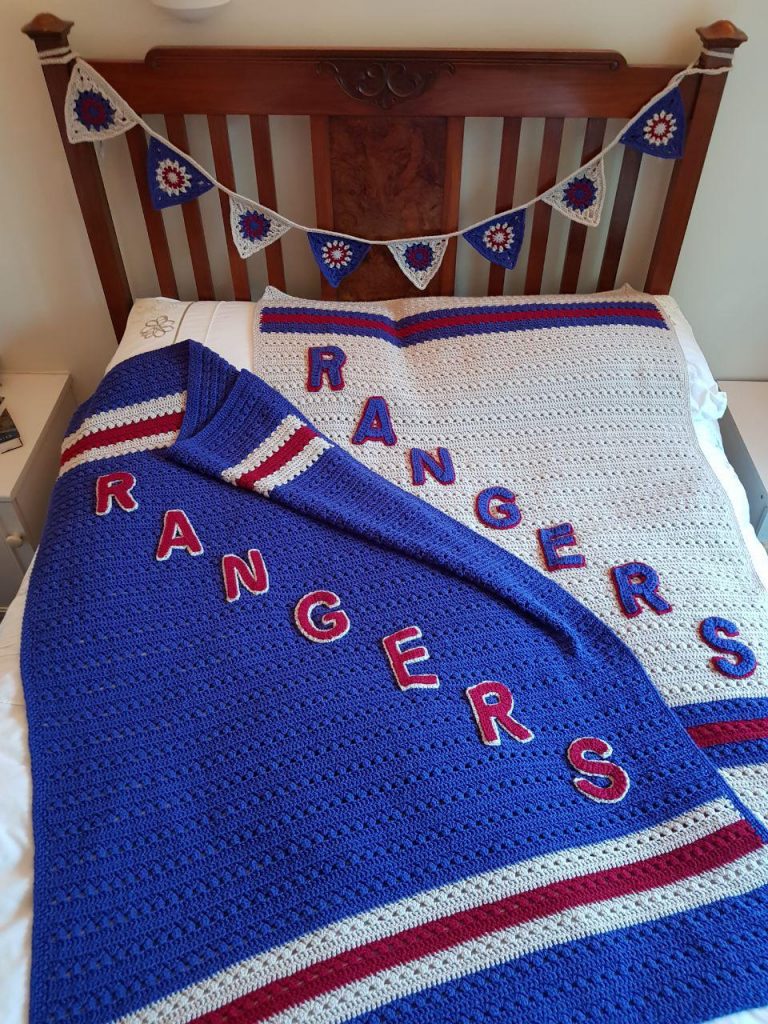
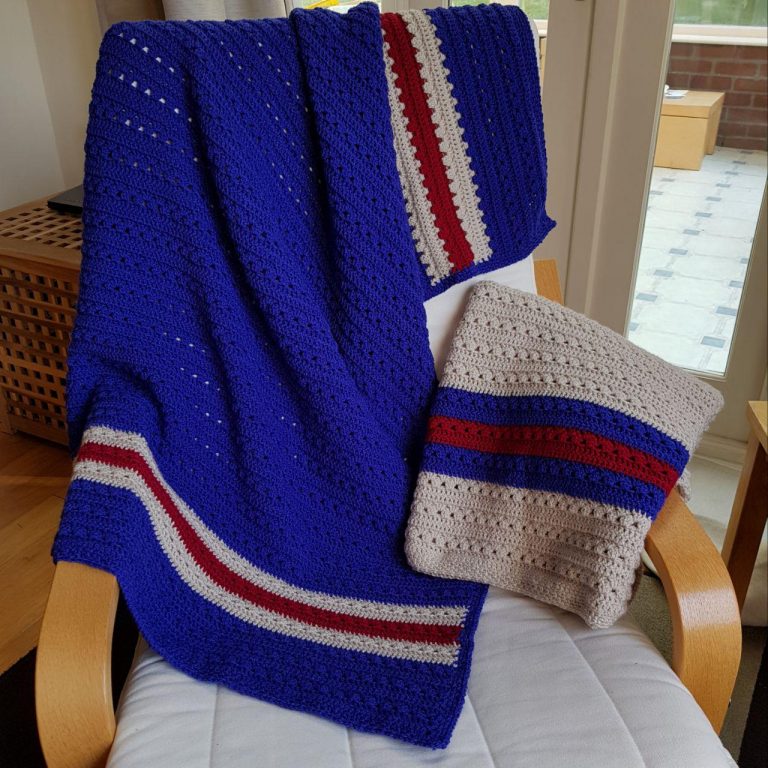
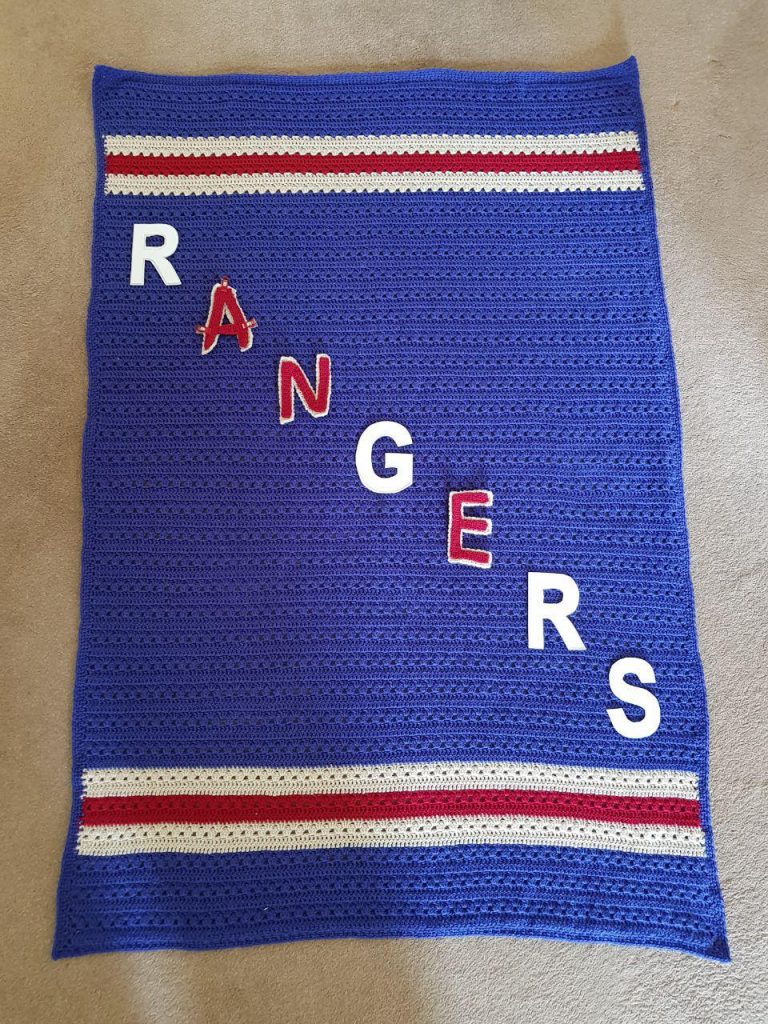
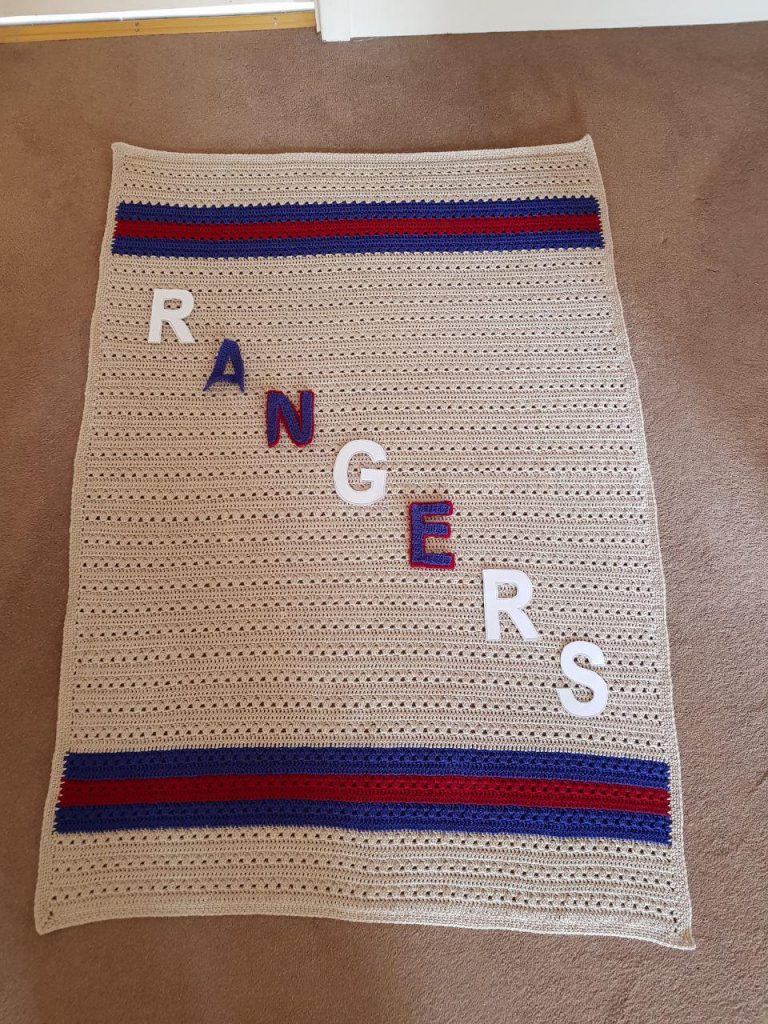
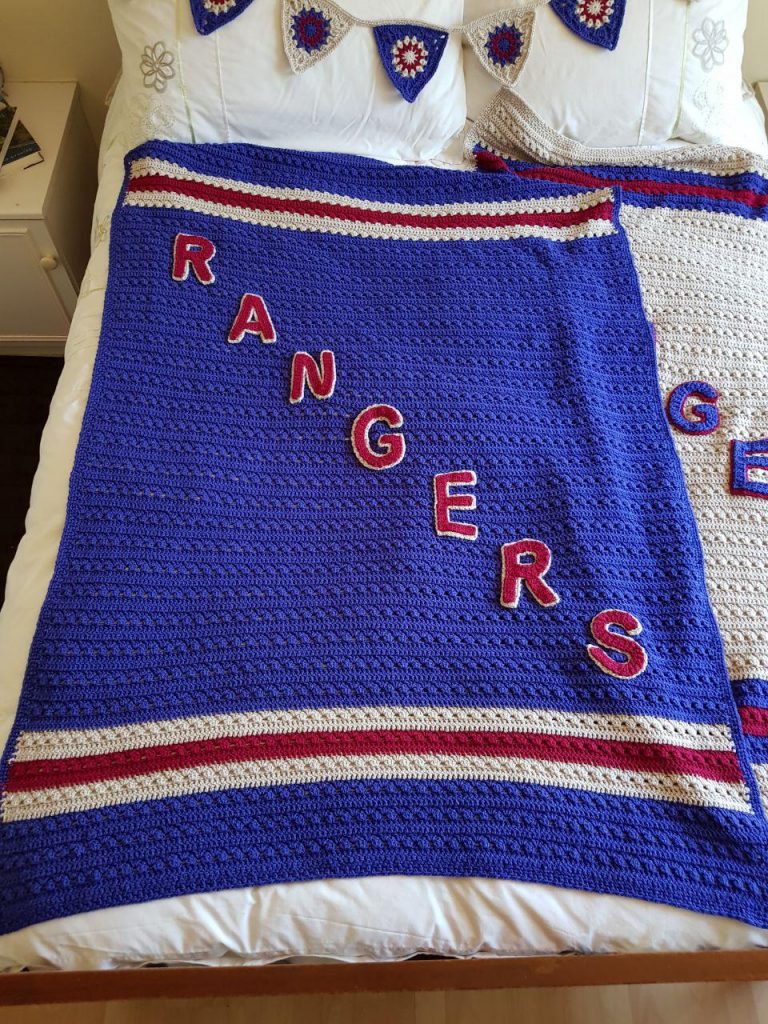
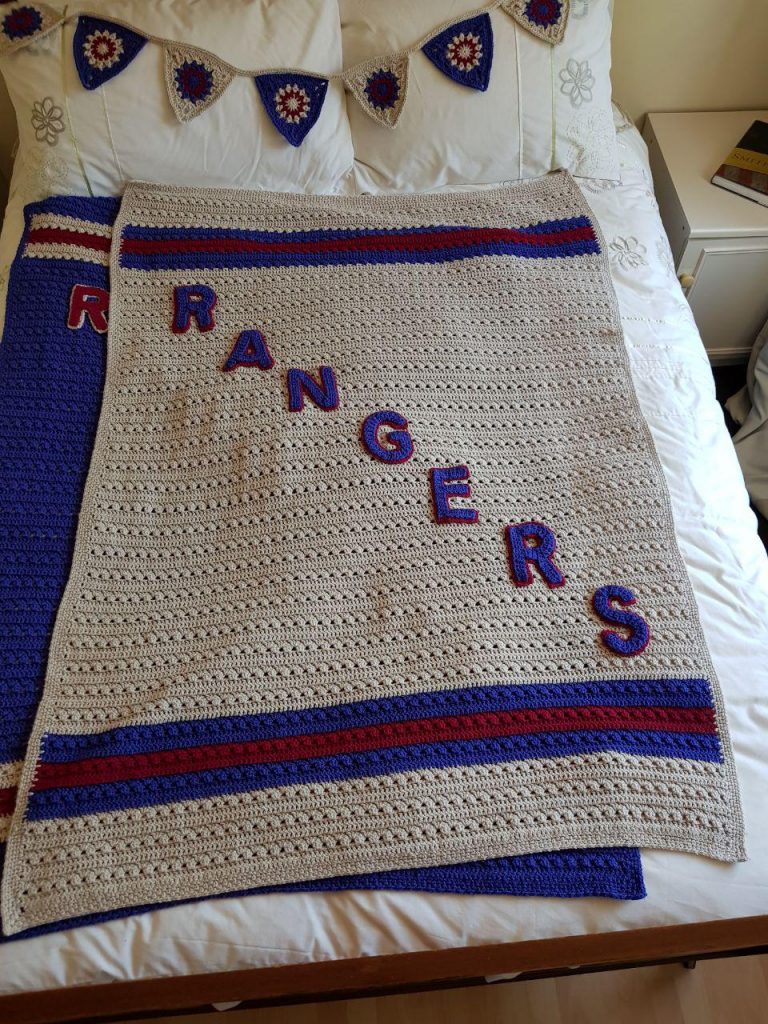
Over the past few months, I’ve mentioned the New York Rangers themed blankets I was crocheting for a friend, who was expecting twin boys. Timing can be everything and on this occasion, I am delighted to say I did finish the blankets in time – despite false starts, procrastination and a dose or two of self-doubt. The blankets were received by the proud papa just hours before his baby boys were born.
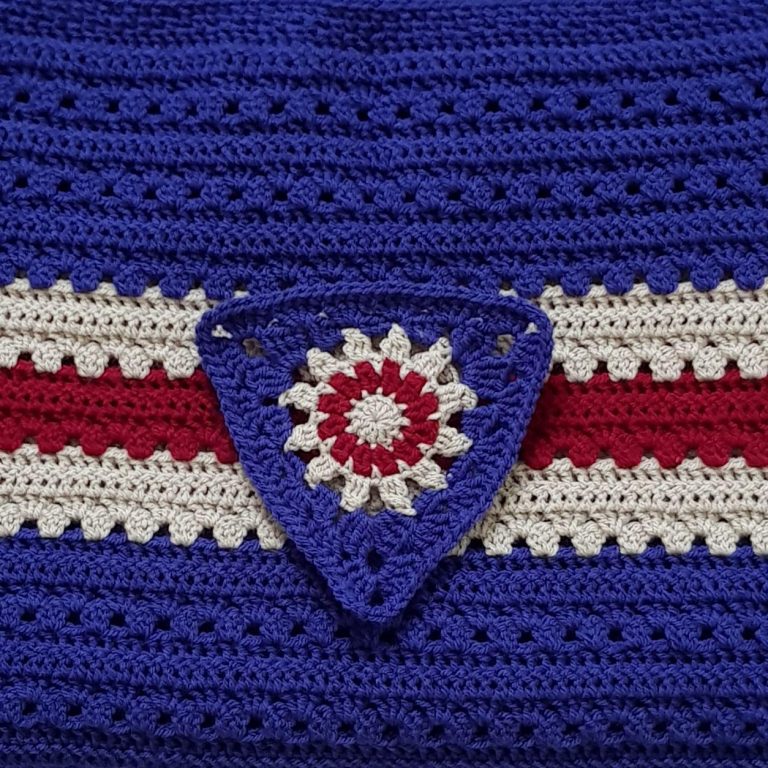
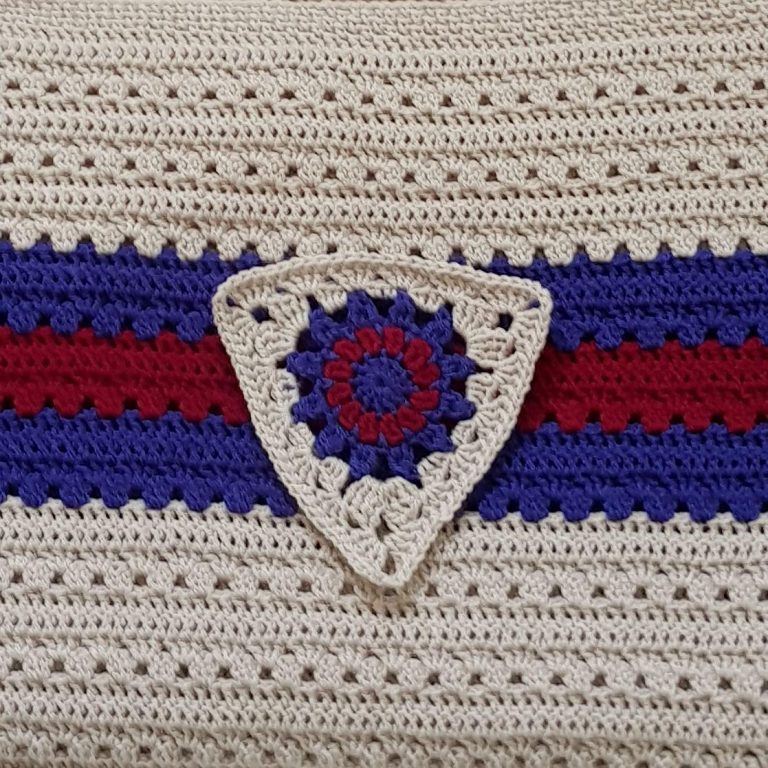
The bunting on the headboard was made to match the blankets. As I usually do, I over estimated the amount of yarn I would need for the blanket project so I had plenty to make a bunting.
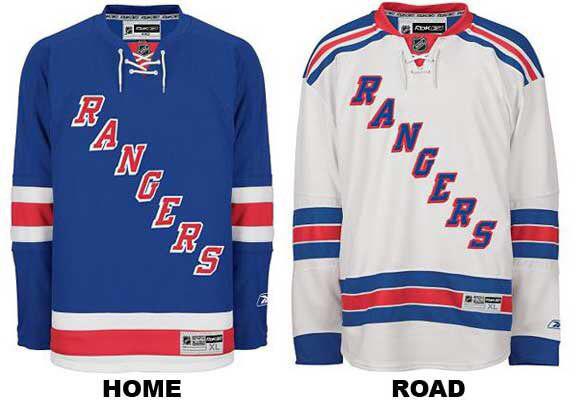
To recap – my friend and his partner are big fans of the New York Rangers. His idea was to make the blankets in the home and away team colours with lettering, similar to the official team jersey.
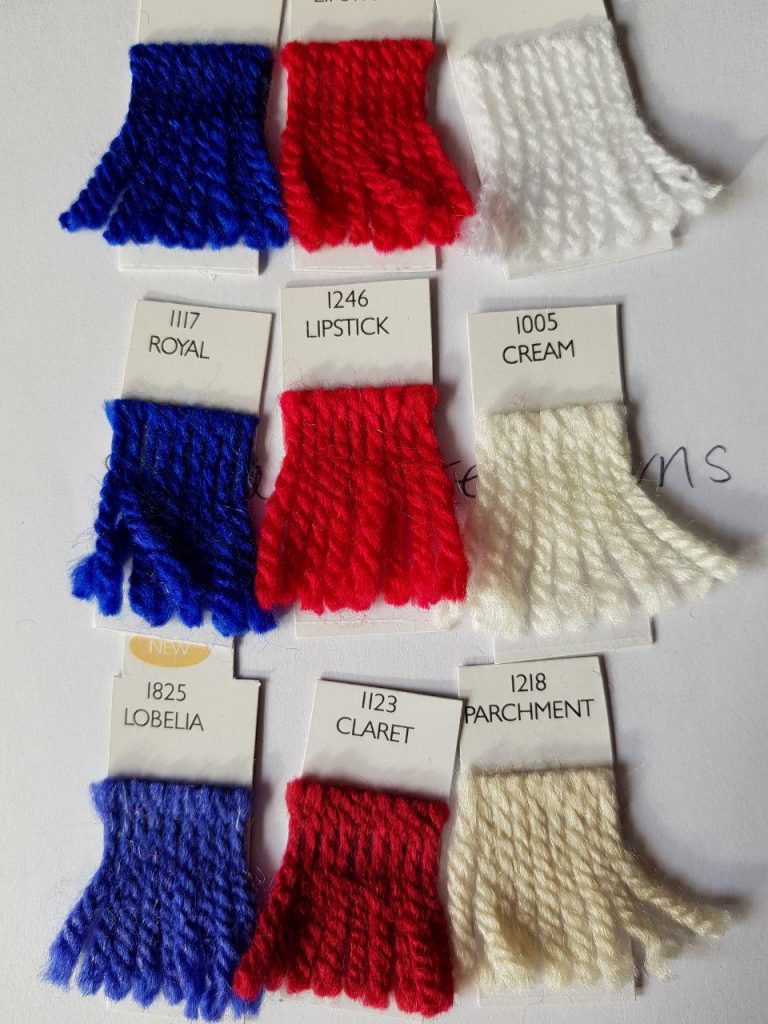
The team jersey colours, when translated to yarn, looked a bit too lurid for me. I put together several Stylecraft Special DK palette suggestions for the new parents to be to consider. The top two rows were closest to the team colours, with the middle row using cream instead of white to try and tone down the brightness of the red and blue. The third palette, I chose colours with a vintage vibe…
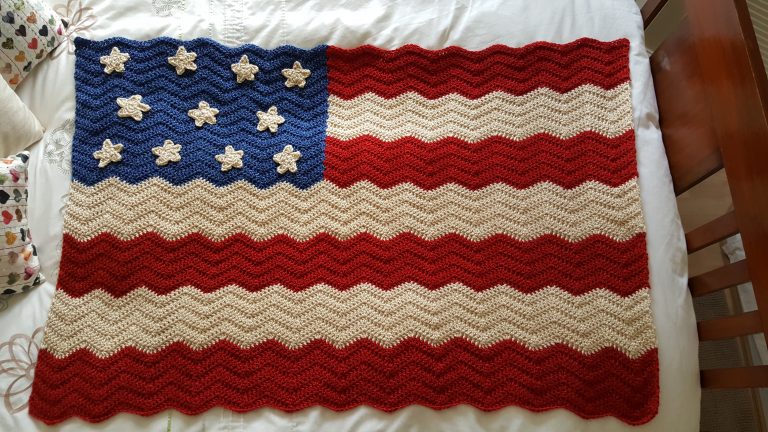
…and shared an image of a blanket I’d made using similar vintage shades to make it easier to see how the colours would look in a structure.
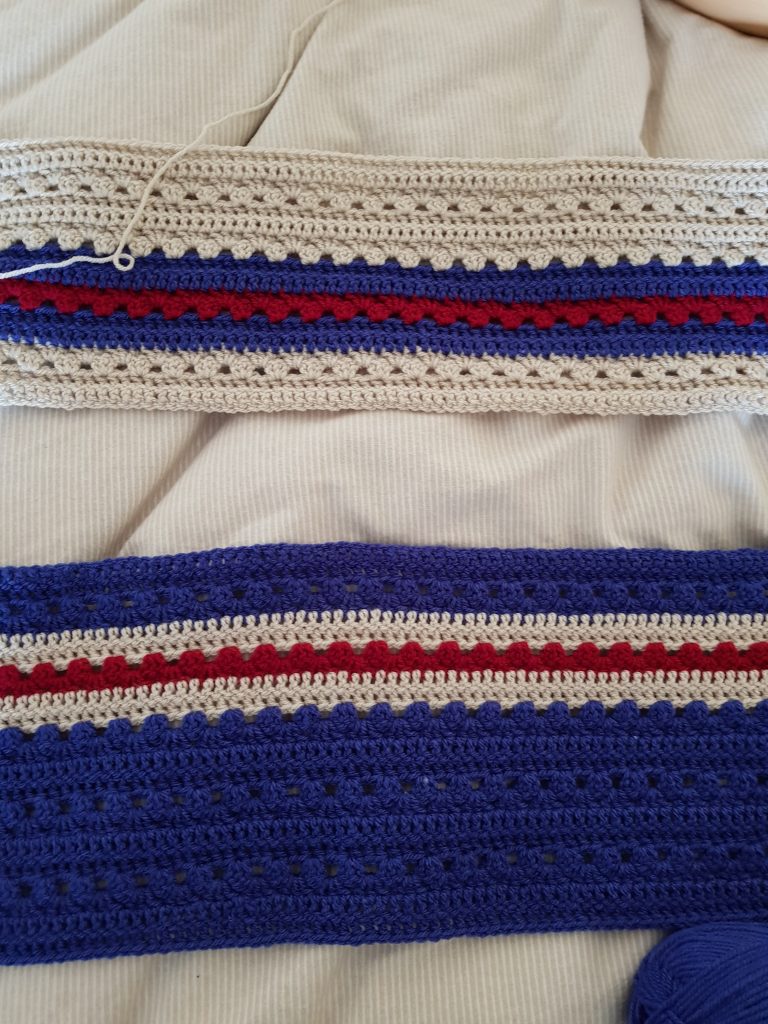
The vintage palette was the winner. The next decision was the blanket size and stitch. After having seen many blankets with appliques against flat backgrounds, I thought the blankets would be more interesting if there was a bit of subtle texture behind the letters. I decided on Lucy’s stitch pattern for the Cosy Stripe blanket.
I used one of my kid’s old cotbed blankets as a size template. I went for this size because infants rapidly outgrow baby blankets. I wanted the boys to be able to use the blankets for years as opposed to months.
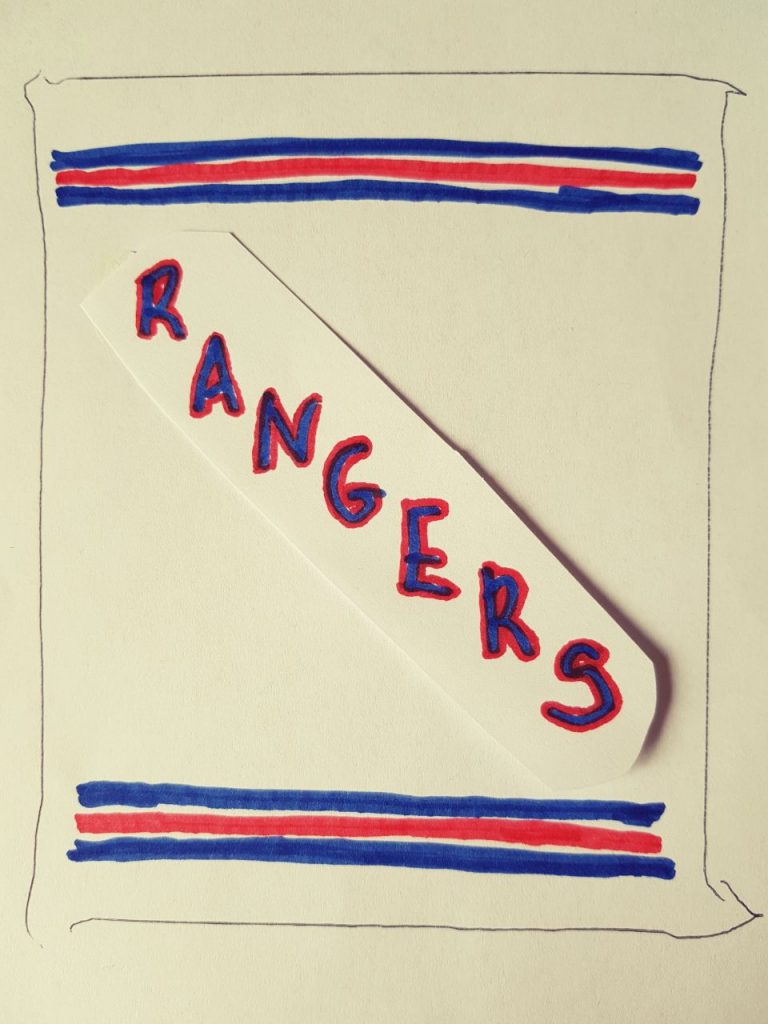
Background sorted, next was the design and letters. Internet research followed by telegram messages back and forth with the expectant dad, we agreed the positioning of the stripes, a font and letter size.
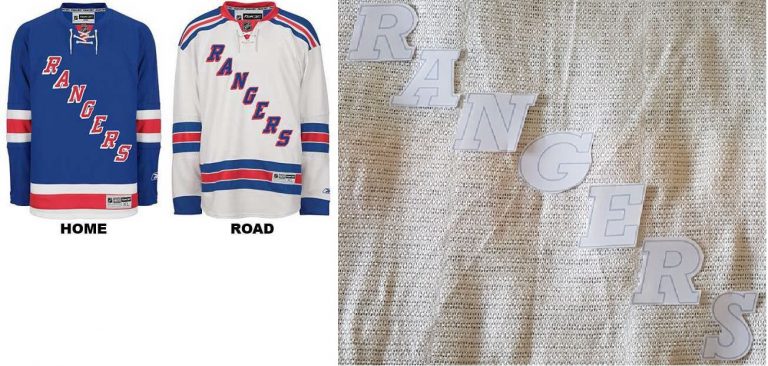
I couldn’t get the exact font the Rangers used on their shirts, so I opted for the closest I could find thinking I would tweak it as I went along.
To confirm my process was correct, I contacted Lucy of Attic24. Lucy was in the process of crocheting letters for her blog header. Lucy very kindly confirmed my approach was sound. This gave me a much needed confidence boost.
Details finalised, I decided to work the blankets in tandem so they would be finished at roughly the same time. Because there was quite a large area in a single colour, swapping from one blanket to the other every 4 rows would keep the project interesting.
My first attempt at starting the blankets didn’t quite go to plan. I had started the stripes at the top too early and made them too narrow. I think had I more experience in design, I wouldn’t have made those mistakes.
It took me quite a while to finish the canvases because – I confess…I procrastinated. I was quite nervous about the lettering, very concerned I wouldn’t be able to pull it off – disappointing the parents to be. I could have finished the blankets at least a month or so earlier had I not been so nervous about the lettering part.
I crocheted a plain border in the linen stitch. The tutorial I follow is on Attic24’s site. I omitted the final scallop row.
I had a few false start with the letters – but again, that is down to inexperience.
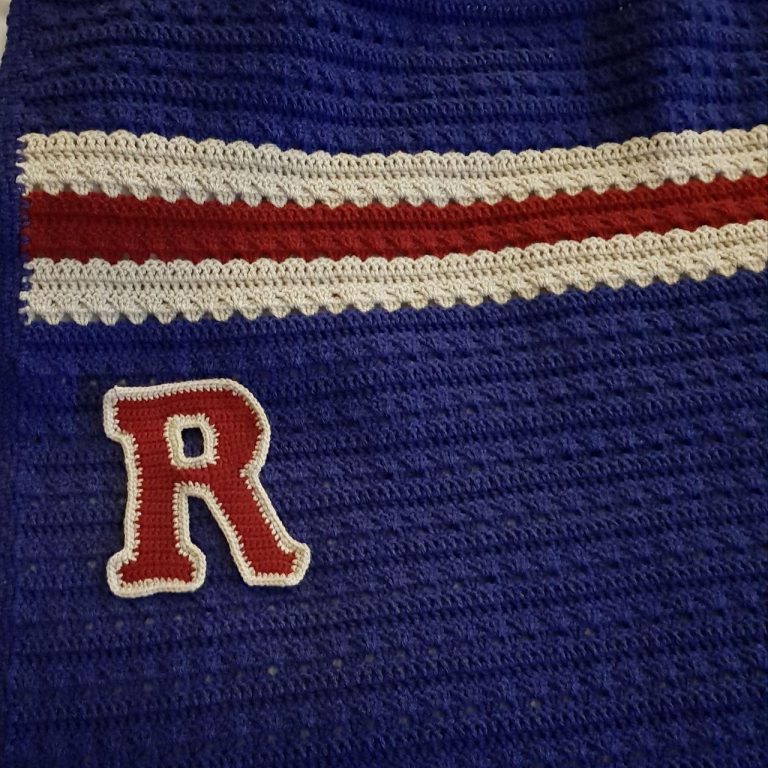 After a third fail and the remembrance of an off cuff remark made by my ‘mom’ some weeks earlier, that actually was a REALLY good idea – it was back to the drawing board for both me and the expectant papa. Turns out the Rangers have used a variety of fonts over the years for their team lettering – not all had serifs. This took the pressure off trying to recreate an exact match to the team lettering.
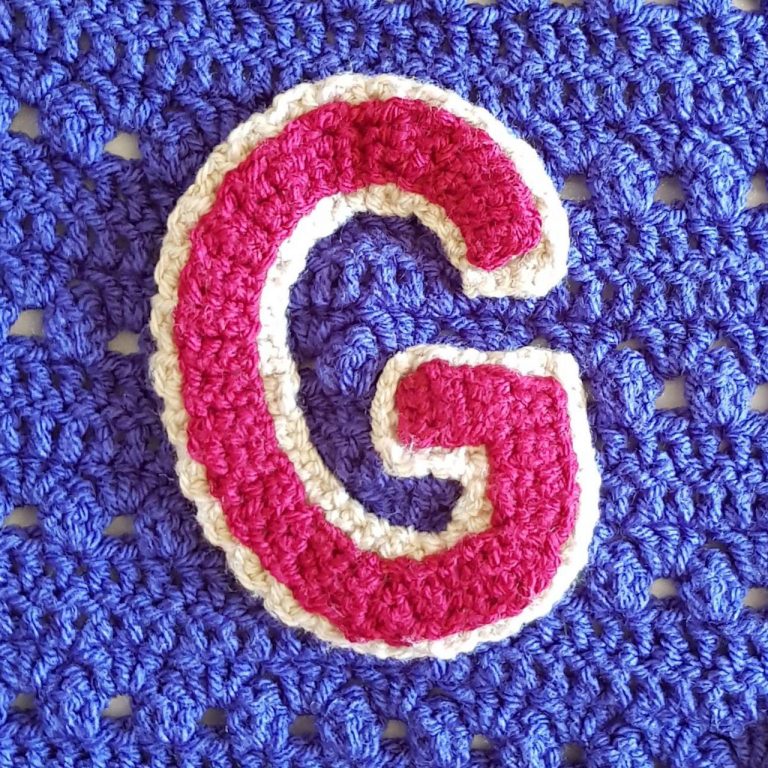
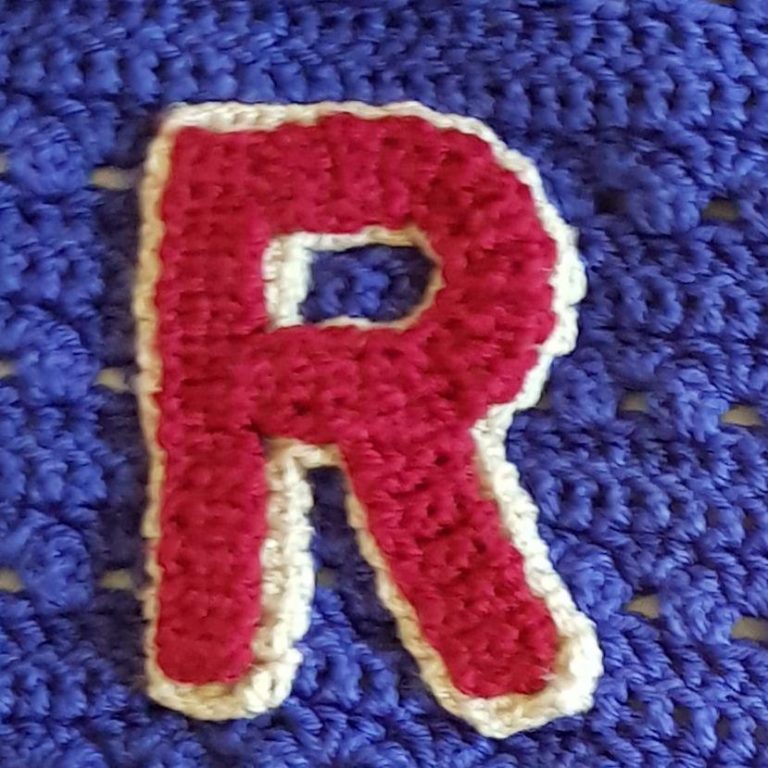
The end result was letters with a 3-D effect that retained their structure after sewing to the body of the blanket and through machine washing and drying.
As I was making the letters, I thought about whether or not to write up patterns. I decided against it. Tension varies from one person to the next. I could write a pattern that works for me, but it might only lead to frustration for anyone else that tries to follow it because their tension will very likely be different to mine.
I decided instead, to describe my process. I’m not brilliant with descriptions, so hopefully the pictures will clarify any unintended ambiguities. Here goes…
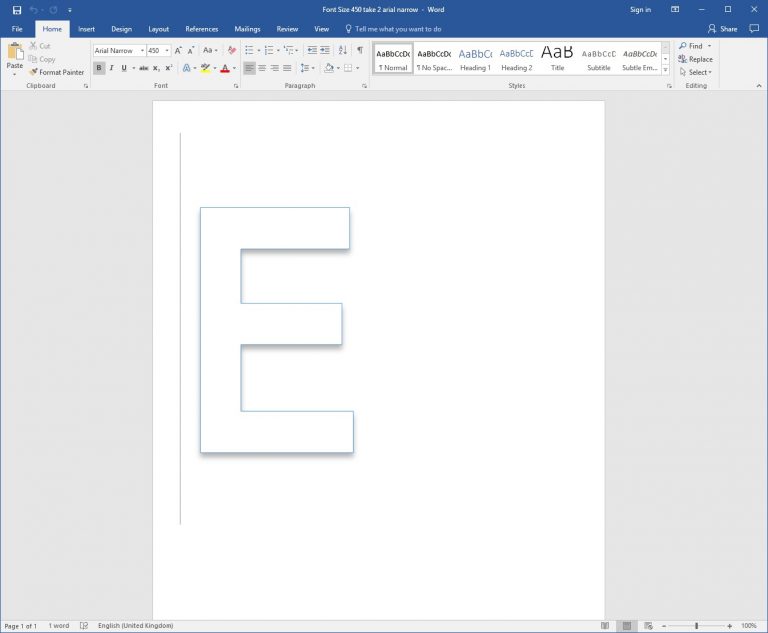
To start, you’ll need a template to work to. I used Microsoft Word and the Word Art function within the program. This font is Arial Narrow.
You may have to type in the font size if you don’t see the size you want in the pull down menu. I ended up with a size 450 for the Ranger letters.
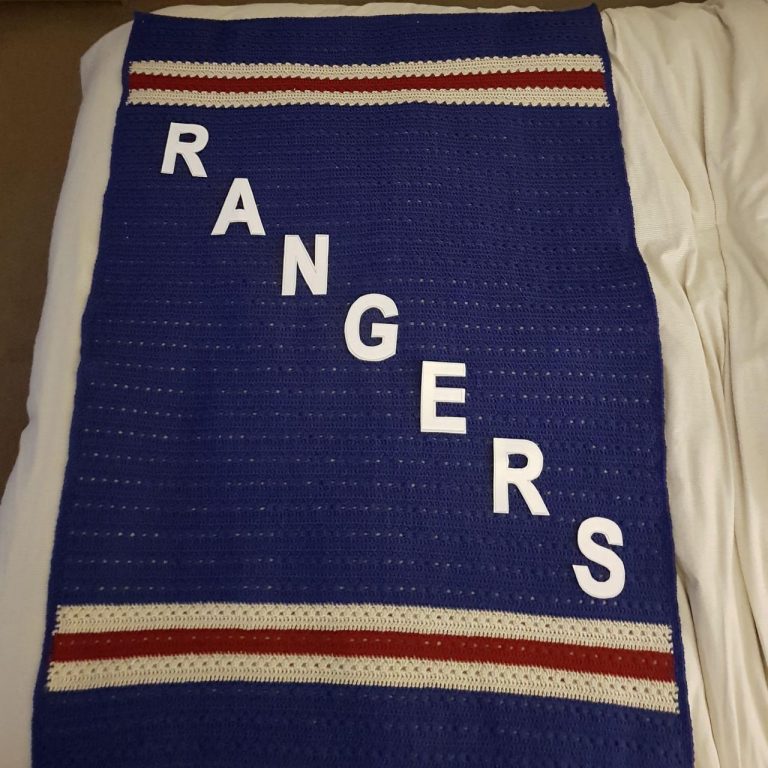
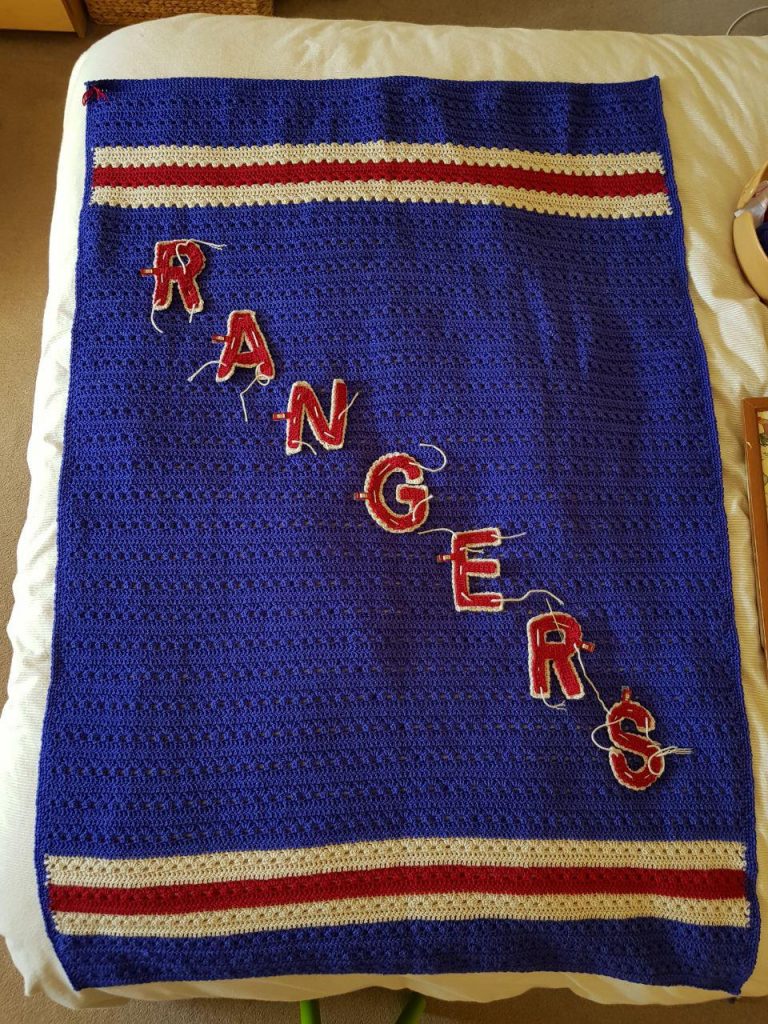
I printed each letter individually, cut them out and laid them on the completed canvas to double check they were the correct size. I repeated the process until I was satisfied with the layout and sizing.
Every now and again, I’d double check my work by laying it out. I took that opportunity to also send progress reports to the parents to be.
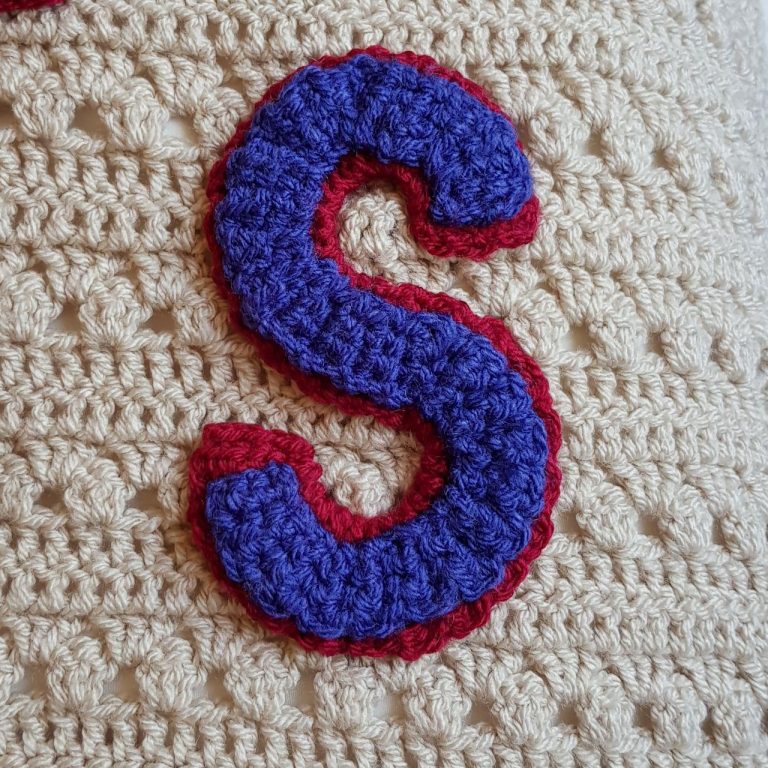
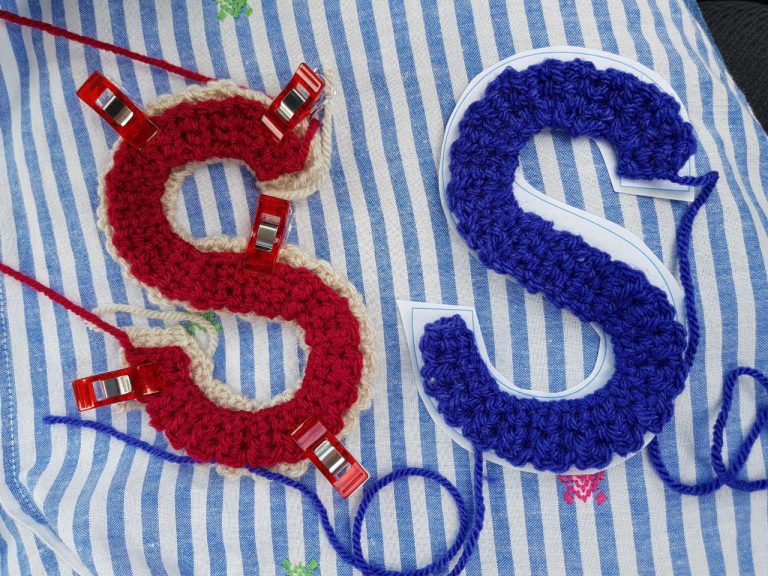
The only letter that I crocheted in one go was the S. All the other letters were crocheted in pieces and then sewn together.
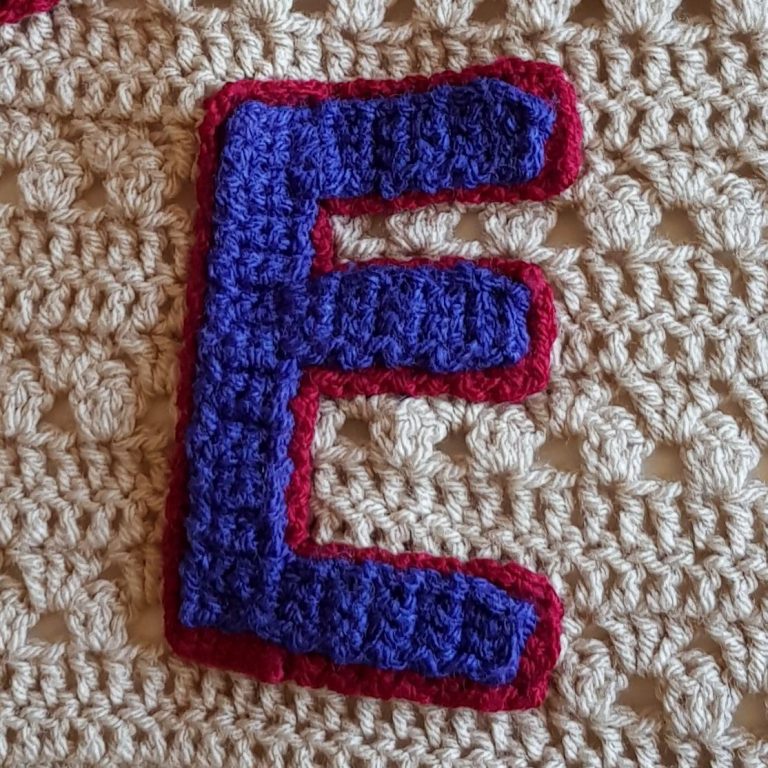
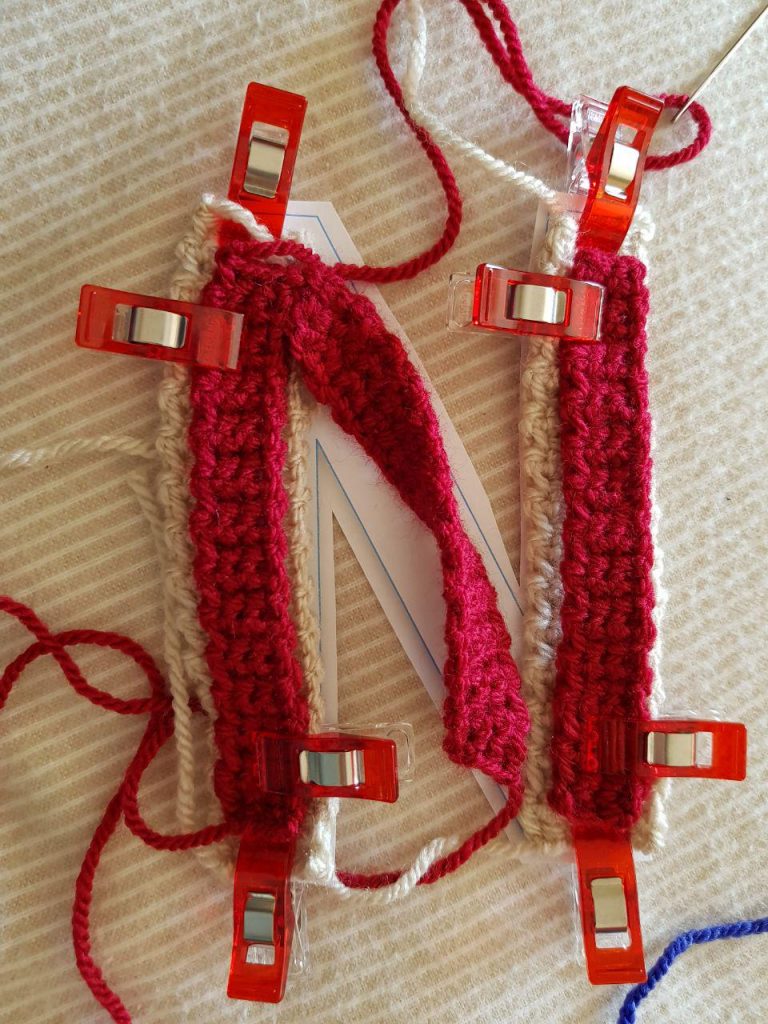
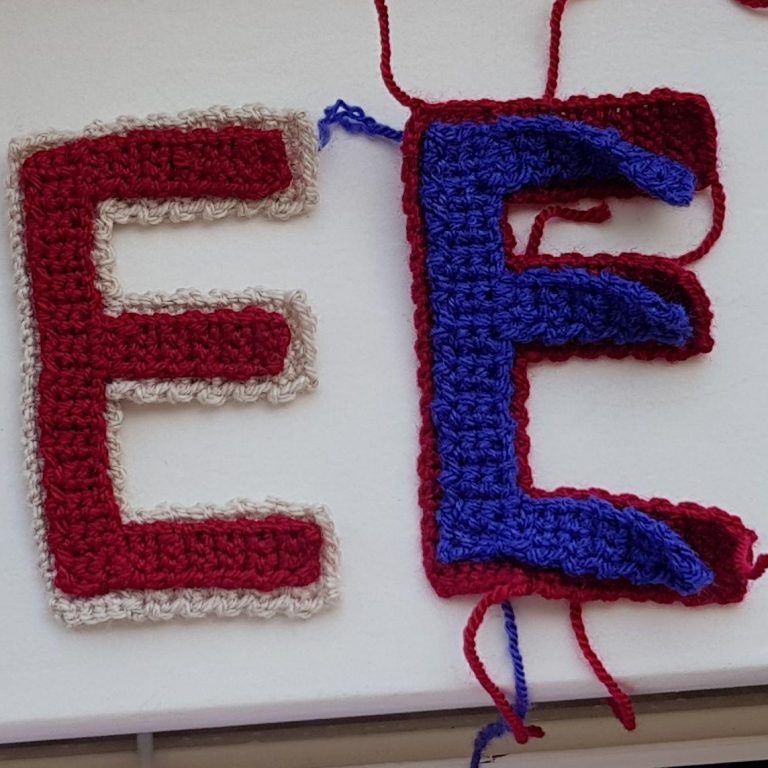
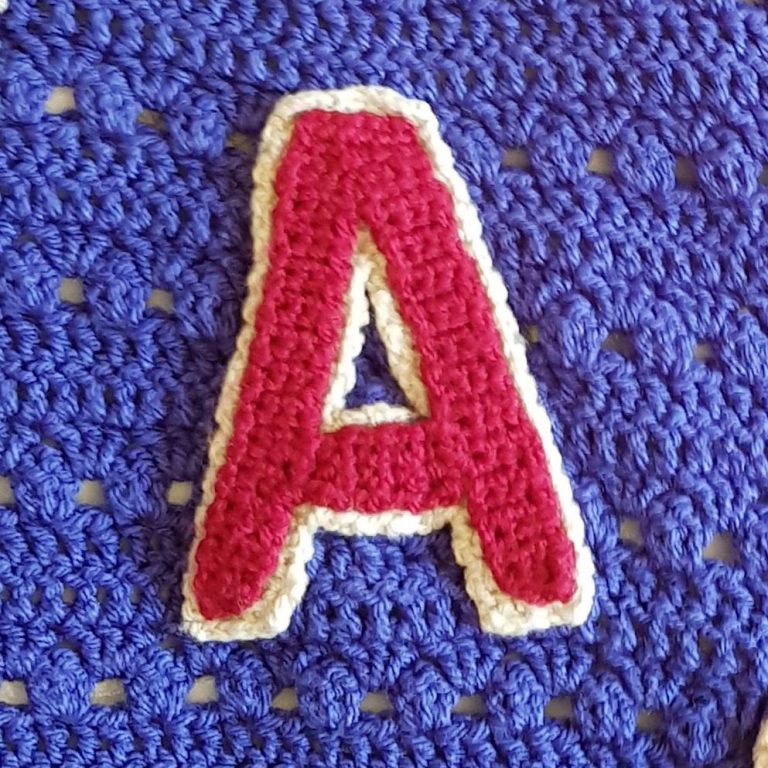
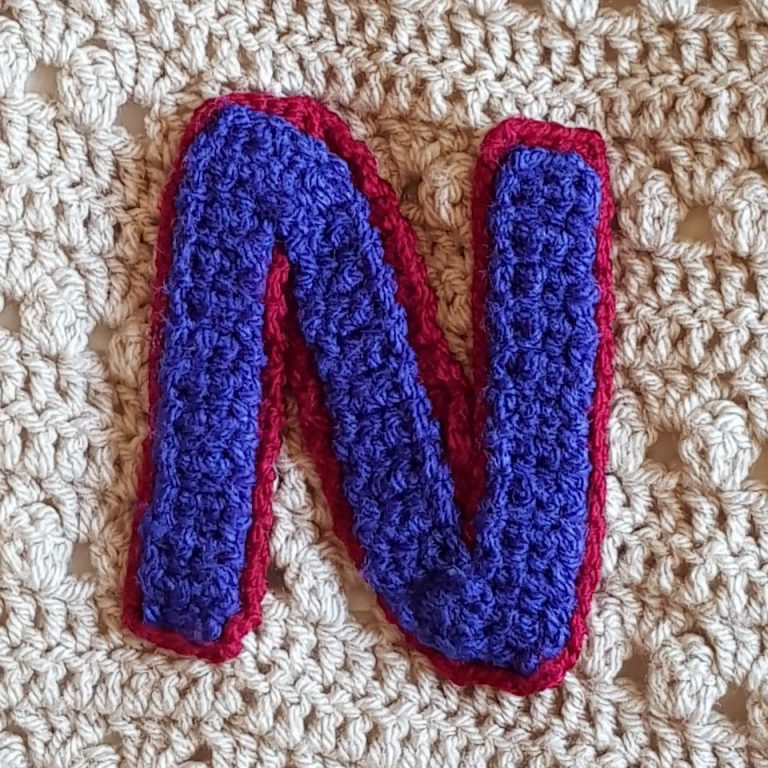
I chose to crochet the pieces with the stitches in contrasting directions. To see what I mean, look at the letter ‘E’.
When I crocheted the pieces so that when assembled, all the stitches were in the same direction, it looked like I was trying to make the letter look like it had been crocheted all in one go – the stitches didn’t align perfectly and it looked a hot mess. For me, contrasting stitch directions looked better and was easier to assemble as per the letter template.
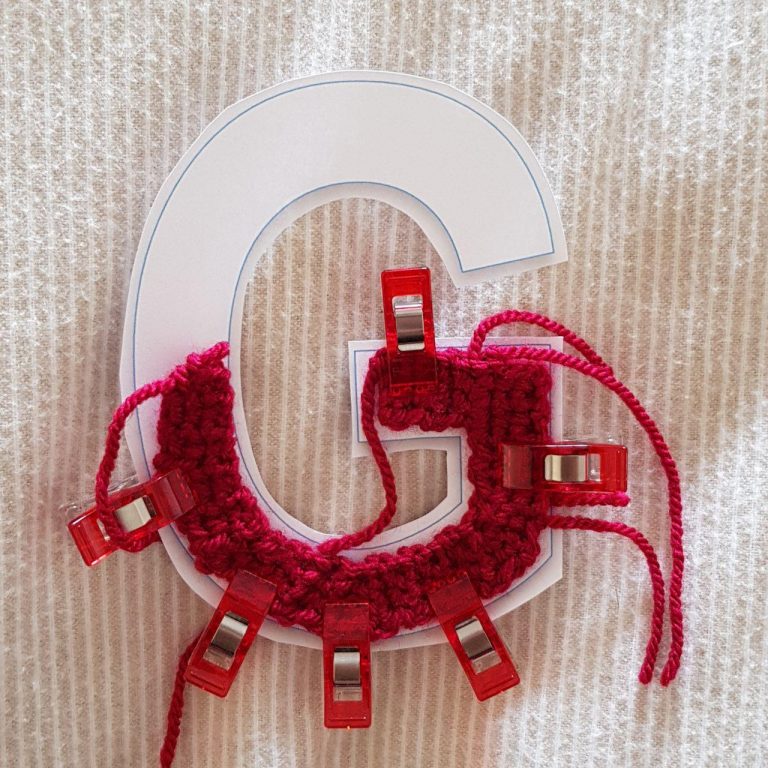
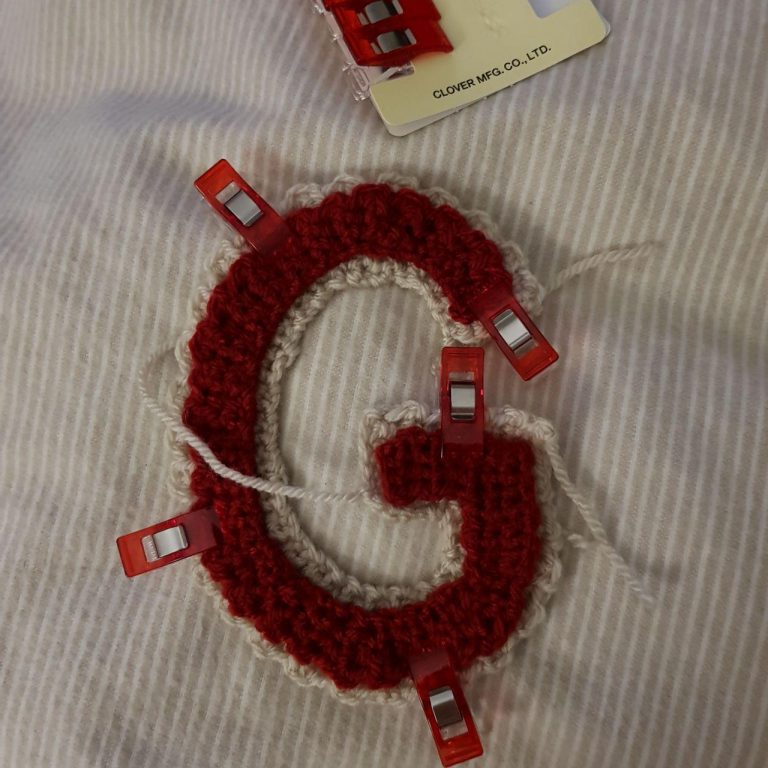
Fabric clips were a great help in crocheting the letter to the shape of the template and helping to hold the finished letters in place while basting them to the blankets. I used Clover Wonder Clips – the packet bears the number 3155 at the top across from the brand name.
The stitches used for forming the letters were a combination of slip stitch, double and half treble crochet (UK terms). US terms, that would be slip stitch, single and half double crochet.
When crocheting straight lettering sections, I used double crochet. When I had to create a curve or angle, I used slip, double and half treble within a row. This can be a bit slow going as you’ll be checking your work is following the template, frogging if it isn’t and redoing.
An issue I came across with making uniform lettering was the yarn weight. I found that with the Stylecraft Special DK, the Claret (red) coloured yarn strand was slightly thinner than the Lobelia (blue) and Parchment colours. Writing down my stitch counts for both sets of letters would have been a waste of time as the subtle difference in weight meant I had to work each of the letters slightly differently to achieve the correct size.
In my first iterations of the lettering, I had crocheted the body of the letter than crocheted the contrasting colour to the body. This resulted in edges I didn’t like the look of, misshapen letters, and the centre of letters like R too small.
To create an outline that would be crisp, I took my ‘mom’s suggestion and did the extra work of crocheting two of each letter for each blanket. I crocheted the foreground letter slightly smaller than the template. I crocheted the background letter slightly larger than the foreground but to the size of the template.
To attach the foreground letter to the background letter so the outline was even, I used the clips to attach the background pieces, before they were sewn together, to the template, then positioned the foreground pieces over the background pieces.
Once I was satisfied with the position of the pieces, starting with the background letter, I began sewing the pieces together while still clipped to the template, completing the background letter before working on the foreground letter.
Once the pieces to the front and back are assembled, you can remove the template and using the clips to maintain the correct positioning, attach the front to the back.
Once the letters are completed, the next hurdle is sewing them to the blanket. That is a tricky business I have to say. Clips were a help with that part of the process.
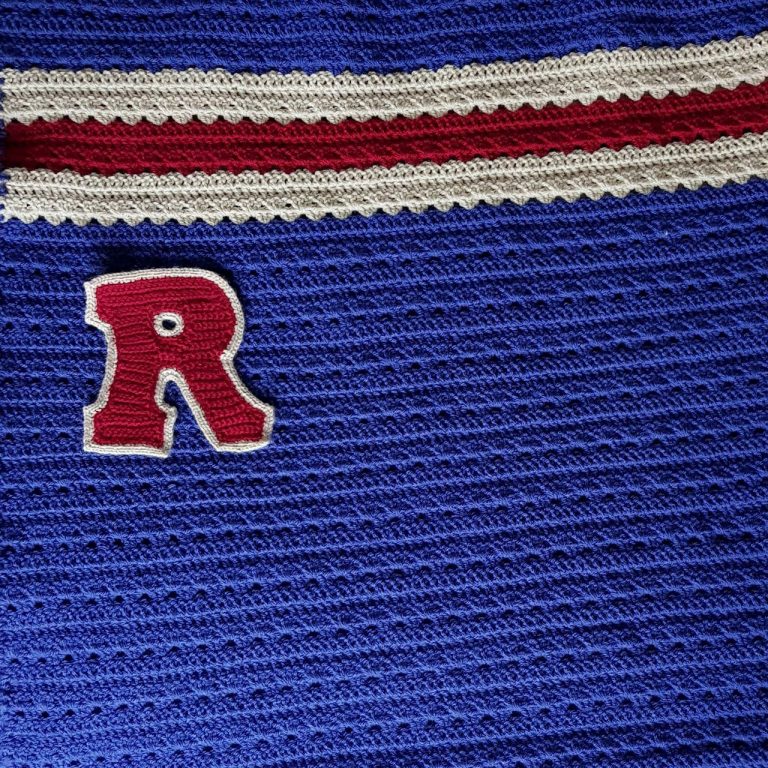
I used a ruler to measure the distance from the R and the S to the stripe and nearest edges of the blanket. Using the ruler again, I measured the distance between the outermost edges of the letters in relation to the letter above. Clips held the letters in place while I used a contrasting yarn to baste the letters to the blanket for additional security.
I used the same colour yarn as the body of the blanket and stitched into the back part and all the way around the edges of each letter, as close to the edge of the foreground letter I could get without the yarn showing through. This creates a nearly invisible stitch from the back of the blanket.
The inner sections, such as the R and the A were the trickiest. However to stand the test of time, I wanted to make it as secure as possible so that there would be next to nothing for the letters to get caught on.
It took me a couple of evenings to sew the lettering on. Once the first blanket was done, the second one went a lot quicker since I knew what I was doing.
With the blankets finished, I thought it might be nice to add a bunting to complete. I love Loretta Grayson’s Rett’s Flower Bunting Pattern. Another series of Telegram messages and measurements and colour pattern preferences were acquired.
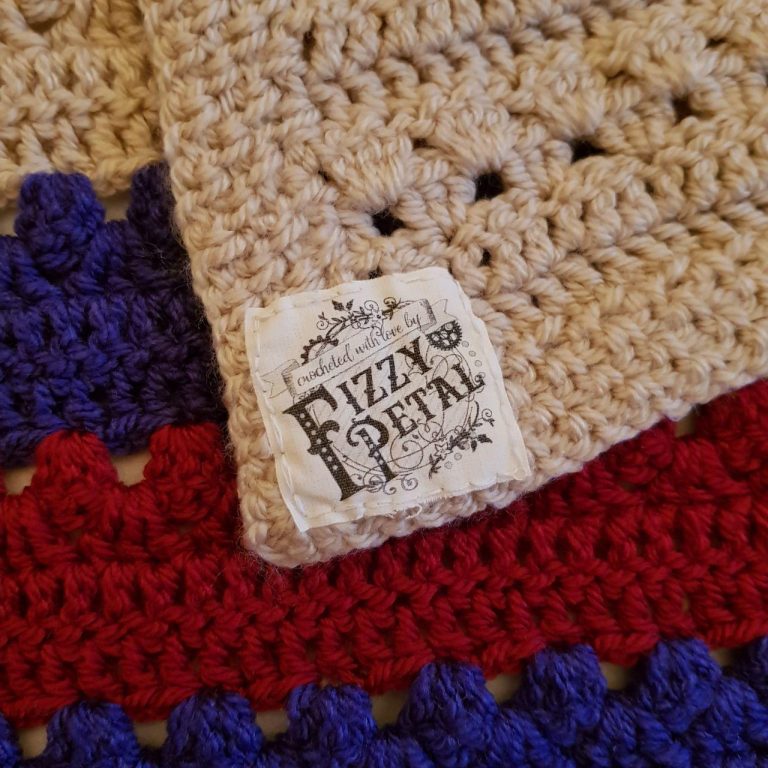
Bunting done, and it was on to the finishing touch…adding my label. The labels were designed by *Melody of Mad Mad Graphics. I sewed the labels on all the blankets and bunting before I washed them to test for durability. They passed with flying colours.
To stop the labels fraying, I applied Prym Fray Check to the edge of the label before sewing onto the work. In the photo above, it looks like I might have missed a tiny part of the edge when I used the Fray Check so hopefully that won’t develop into anything more over time.
When I ordered the labels, I opted for sheets that I thought I could cut myself. However, I had difficulty in seeing the guide dots – that isn’t an issue with the labels, that is an issue with me and my vision. In future, I will used the cutting service Melody offers.
All in all, creating the blankets was a thoroughly enjoyable experience. My friend that I made these for was very supportive throughout the process which helped me when I had periods of self doubt.
Now it is back to finishing other WiPs in my queue…the first of which is to be a Solar System blanket inspired by and in part crafted to the pattern designed by Two Hearts Crochet. I started it before I received the happy news my friend was expecting – I frogged it earlier today after having looked at it with fresh eyes. I want it to be a bit thicker so I’m deviating from the pattern slightly. I shall keep y’all updated as I progress.
Hope y’all have a happy, colourful, yarny week!
Update 21 September 2025: Sadly, the lovely Melody passed away and so Mad Mad Graphics is no more.

Comments are closed, but trackbacks and pingbacks are open.