Correction: The chunky V-stitch blankets were inspired by Repeat Crafter Me. I’ve updated the Pattern Sources page with her details and added a new post correcting the attribution.
~~~~~~~~~~~~~~~~~~~~~~~~~~~~~~~~
My first tutorial…wowza! I have a renewed appreciation for others sharing their knowledge after spending 5 hours photographing and writing my tutorial with an additional 3 hours fighting WordPress formatting. I think I’ve won so without further ado…
~~~~~~~~~~~~~~~~~~~~~~~~~~~~~~~~
The v-stitch is my go-to when I want to give a gift of comfort or celebration and time is of the essence.
Le monde de Sucrette wrote chart patterns in two variations: V- stitch stripes (Version2) and V stitch stripes. Version 2 results in a slightly puffier V-stitch than the original. Both are free on her website.
This text and photo tutorial is my translation of Le monde de Sucrette’s original V-stitch chart pattern – it does not include colour changes.
Google search ‘changing colours in crochet’ and you will find numerous tutorials. If you don’t mind darning in ends, Attic24 has a simple, neat and secure method – not specifically a tutorial, she includes changing to a new colour in her Cosy Stitch pattern and in various patterns on her site.
Alternatively, there is the Russian Join that involves no darning but as I’ve not tried it myself, I can’t offer an opinion.
For this tutorial I have used Stylecraft DK in Aster with a 4mm hook. The pattern is written in UK terms. Do read through the entire tutorial before starting.
Term Translations
DK = USA DK/Light Worsted or Australia 8-ply
Chunky = USA bulky or Australia 12-ply
dc = USA single crochet (sc)
tr = USA double crochet (dc)
Skill Level: Beginner
Foundation Chain: The pattern is worked in multiples of 3 + 2. Chain (ch) in multiples of 3 up to desired width then add 2 ch for turning.
Row 1. One treble crochet (tr) into the 4th ch from hook. Ch1. One treble crochet (tr) into the same chain as the first tr. First V complete.
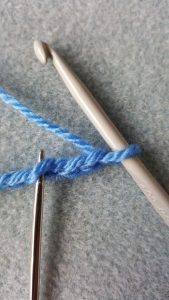
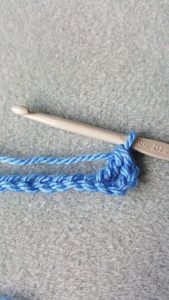
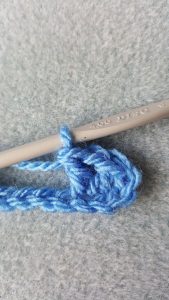
*Skip 1 ch, tr into next ch, ch1, tr into same ch*. Second V completed. Repeat ** until there is one ch left at the end of your foundation chain. Tr into last chain. Turn.
Each row will begin with a chain-2 stitch followed by a V-stitch and end with one treble preceded by a V-stitch.
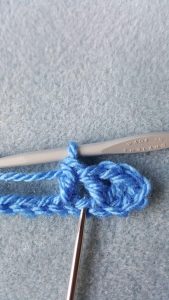
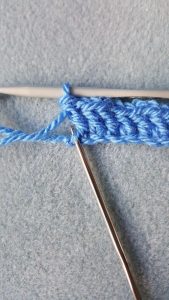
Row 2. The stitches in this row are worked into the ch 1 space in the centre of the ‘V’ shape.
Ch 2, *tr into first ch1 space, ch1, tr into same ch1 space*. 1st V completed. Carry on ** into each ch1 space until you get to the end of the row. Tr into top of starting ch in previous row. Turn.
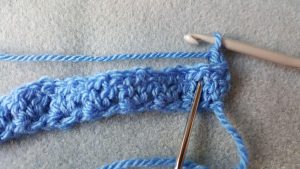
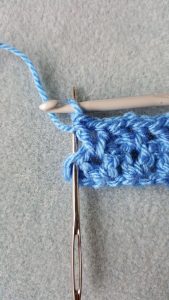
Repeat Row 2 until desired length.
Tip: Be sure to keep your ch2 stitches relaxed at the start of each row. Too tight a chain results in too short a stitch and will cause the work to dip in the corners.
As you can see by my photos the V-stitch shape is difficult to see in Row 1, especially when you turn the work for starting Row 2. As you work the rows, the stitch becomes more defined.
Tension Issues
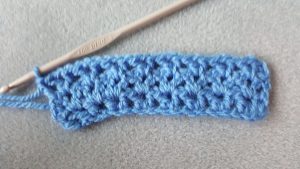
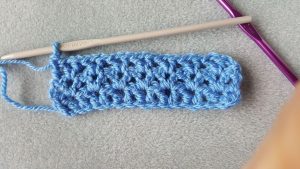
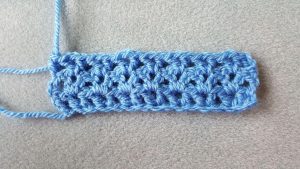
My first swatch attempt shows the work pulling down at the bottom because my foundation chain was too tight. I changed to a 4.5mm – the pull at the bottom of the work was less pronounced but still too tight. The final swatch is using a 5mm for the foundation chain, 4mm for body of the work.
Foundation Row – Fizzy Mod
Edit 02 April 2018
I over complicated the foundation row – it is not necessary to add in that extra row. Just working the stitches the pattern calls for into the back loop on the reverse side of the chain makes for a neater edge and easier work when adding a border.
To make starting the main body of work easier, I double crochet a row into the back-middle loops of the foundation chain. This also serves as a bottom border. After the blanket is complete, adding a single dc border to the sides and top of the piece is a simple way to tidy up the edges and finish off the work.
If you want to work up a wider border, the dc border is a great foundation to build on.
Double Crochet Foundation Row: Ch to desired width in multiples of 3. Add 2 chains for turning. Dc into the back middle loop 4th ch from hook. This makes your first dc stitch. Dc into the back middle loops of each stitch along. Turn. Foundation row complete.
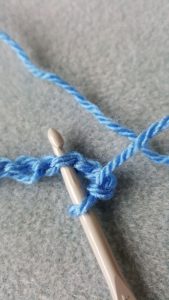
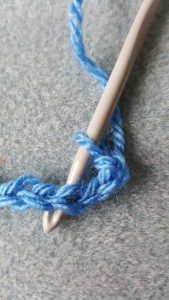
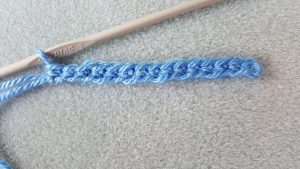
Row 1. Ch 2. Ignore stitch at base of ch 2. Tr into next stitch, ch1, tr into the same stitch. *Skip one stitch. Tr, ch1, tr.* Repeat ** until there is one stitch left at the end of your foundation row. Tr into the last stitch. Turn.
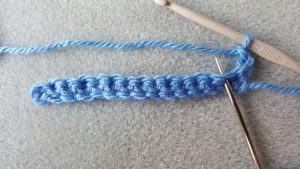
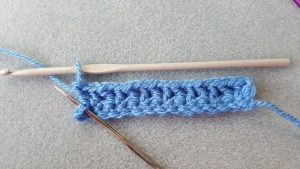
Row 2. Ch 2, tr into first ch1 space, ch1, tr into same ch1 space. 1st V completed. Carry on tr ch1 tr into each ch1 space until you get to the end of the row. Tr into top of starting ch in previous row. Turn.
Repeat Row 2 until desired length.
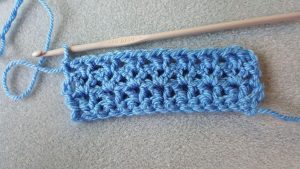
Tension Issues (again!) Not pictured above is the original completed swatch using my dc foundation row method. The work was a little uneven on the bottom right side. This is because my dc into my foundation chain was too tight. To sort this, I redid the swatch (see below) using a 5mm hook for the foundation chain and dc stitches. I reverted to the 4mm for the rest of the swatch. There is a slight indent where the beginning of the foundation row meets the end of Row 1. If this happened with a full size blanket I could hide that indent with a border.
For comparison, the double crochet foundation row left; the V-stitch worked directly into the foundation chain.

Completed V-Stitch Throws
I made these blankets using chunky yarn – this made them very squidgy, snuggly and quick to work up. It took me less than a week to crochet each blanket.
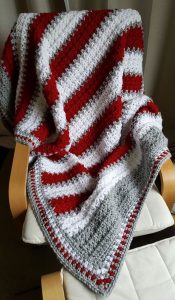 The red, white and silver throw was a retirement and thank you gift for the head teacher at the school my children attend. I used King Cole Big Value Super Chunky in Grey, Wine and White. I did think at the time this would make a great Christmas blanket.
The blanket is representative of the school’s team colours.

My husband’s Grandma Lora knitted or crocheted for anyone who asked. When Grandma Lora fell ill, I wanted to repay her generosity with something that might give her warmth and comfort.
For Grandma’s blanket I used Scheepjes Roma Big in colours 5, 55, 6, 52, 59, 2 and 60. Grandma loved it and used it as a bedspread. When Grandma Lora passed 6 months later, her daughter asked to keep the blanket which I thought a marvellous complement.
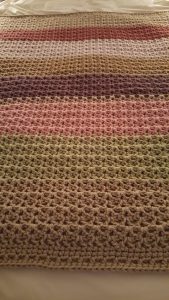
This blanket went to the wife of a colleague of my husband’s. When my husband told me the story of this young woman with terminal cancer, I felt I had to do something to show our support. Her husband said his wife liked earthy colours – Autumn hues seemed to fit. I used Scheepjes Roma Big in 54, 24, 53, 60, 6, 59 and 55. I wish I would have photographed the blanket in daylight; this image doesn’t do it justice.
Borders
For the red, silver and white blanket I followed Attic 24’s Linen Stitch tutorial.
For Grandma Lora’s blanket, I ran out of time so opted for a quick double crochet border.
The final blanket, I made the border up as I went along with a combination of double and treble crochet.
A final note…
I am a visual learner. I watched YouTube videos to learn crochet and still do if I’m stuck with a new technique. I can pause and rewind however long it takes until the lesson ‘clicks’.
Pattern reading was my next challenge in my learning journey. I found written patterns hugely confusing, in part because I didn’t have the terminology memorised and I couldn’t with my minds eye ‘see’ the stitches. I found pattern charts far easier and would look specifically for patterns that included charts.
Following pattern charts helped me learn to read text only patterns. There are still times when text patterns confuse me – especially if there are lots of steps within a row. My top tip is to re-type the pattern into bite size chunks. It makes a complicated pattern much easier to follow.
I hope my tutorial on Monde de Sucrette’s V-stitch chart pattern will help others follow pattern charts and vice-versa with more ease. In the meantime, have a fantastic week!
Page last updated 21 September 2025

Comments are closed, but trackbacks and pingbacks are open.